
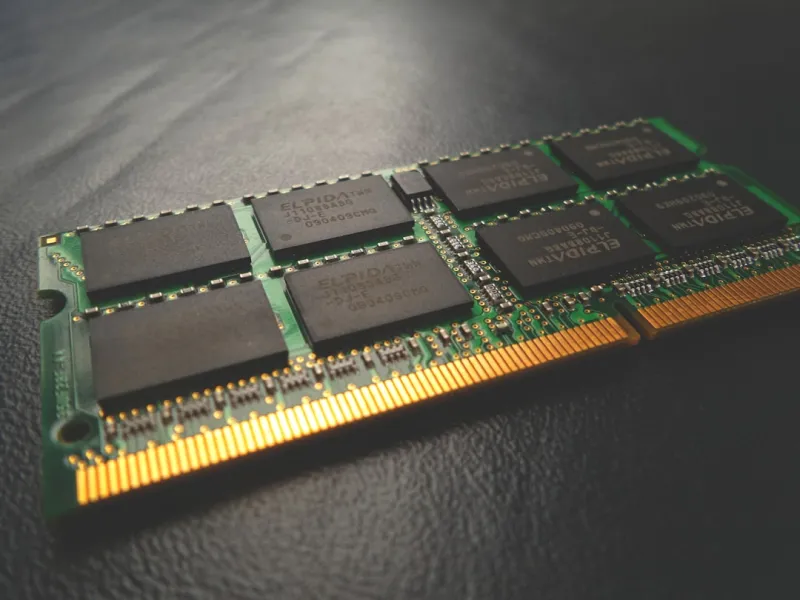
When my workstation started stuttering during a massive data‑science batch job, I knew the culprit was more than just a sluggish CPU. As a longtime power‑user, I’ve learned that memory—especially RAM—acts like the nervous system of a PC, and any glitch can send the whole body into a seizure. In 2026, with DDR5 modules hitting 64 GB per stick, the sheer volume of data we shuffle daily makes RAM health a non‑negotiable factor. In this deep‑dive I’ll walk you through the exact steps I take to isolate, test, and ultimately conquer memory‑related nightmares, all while keeping an eye on the broader ecosystem of components that can masquerade as RAM problems.
Modern RAM Basics: What’s New in 2026?
Understanding the current landscape of memory technology is the first line of defense. DDR5 has become the standard for high‑performance builds, offering double the bandwidth of its DDR4 predecessor and introducing on‑die ECC (Error‑Correcting Code) on many enthusiast modules. Capacities have exploded—64 GB sticks are now commonplace, and 128 GB kits are affordable for professionals who run large in‑memory databases or AI inference workloads. However, this power comes with tighter timing tolerances and stricter voltage requirements. A module that looks perfect on the box can become a ticking time‑bomb if paired with an older motherboard that doesn’t fully support its SPD (Serial Presence Detect) profile. That’s why I always double‑check the compatible RAM list on the manufacturer’s website before making a purchase, and I keep a spreadsheet of tested configurations for quick reference.
Symptoms That Point to Memory Mayhem
Faulty RAM manifests in a surprisingly wide array of symptoms, many of which can be mistaken for software bugs or GPU failures. Random blue screens (BSODs) with codes like “MEMORY_MANAGEMENT” or “PAGE_FAULT_IN_NONPAGED_AREA” are classic signs. You might also notice unexplained application crashes, especially in memory‑intensive programs like video editors or virtual machines. Slow file transfers, jittery gaming performance, and even delays when opening simple utilities can all trace back to a misbehaving DIMM. For power users, the most insidious symptom is data corruption that slips past regular checks, leading to subtle calculation errors that only surface after hours of processing. When you see these red flags, it’s time to treat RAM as the primary suspect before digging deeper into the GPU or storage subsystems.
Diagnostic Arsenal: From Built‑In Tools to Bootable Suites
The Windows Memory Diagnostic tool is a convenient first step, but it only scratches the surface. I prefer a bootable suite like MemTest86, which runs a battery of stress tests outside the OS, eliminating software interference. Create a USB stick, boot into the MemTest86 environment, and let it run at least three full passes (each pass can take 30‑45 minutes depending on module speed). Watch for any “FAIL” markers—these indicate hard errors that require immediate replacement. For a quicker, on‑the‑fly check, the built‑in Windows Resource Monitor can highlight unusually high memory usage spikes that correlate with system instability. Remember to log the exact time stamps of any crashes; cross‑referencing these with MemTest86 results often reveals a pattern that points directly to a defective stick.
Physical Inspection: The Hands‑On Approach
Before you fire up any software, open the case and give the RAM a visual once‑over. Look for bent or missing pins on the module contacts, dust buildup in the DIMM slots, or any signs of thermal stress—discoloration or warped heat spreaders can indicate overheating. Gently reseat each stick, applying even pressure until the latches click into place. If you have multiple modules, try swapping their positions; some motherboards are finicky about which channel a particular stick occupies, especially when mixing different brands or capacities. While you’re in there, double‑check that the CPU cooler isn’t making contact with the RAM, a scenario that became more common with the larger heat spreaders on modern high‑frequency modules. A clean, well‑seated DIMM can resolve issues that otherwise masquerade as deep‑seated hardware failures.
BIOS Tweaks and XMP Profiles: Balancing Speed and Stability
Many power users enable XMP (Extreme Memory Profile) to push their DDR5 sticks to rated speeds of 6000 MT/s or beyond. While this yields impressive real‑world performance, it can also introduce instability if the motherboard’s voltage regulation isn’t up to the task. Enter the BIOS. First, verify that the BIOS version is the latest—manufacturers regularly release microcode updates that improve memory compatibility. Next, manually set the DRAM voltage a few percent higher than the XMP specification (e.g., 1.40 V instead of 1.35 V) and increase the command rate from 1T to 2T for a more forgiving timing window. If you experience persistent crashes after enabling XMP, dial back the frequency in 200 MT/s increments until stability returns. This iterative approach ensures you get the most out of your RAM without sacrificing reliability.
Isolating the Fault: One‑Stick‑At‑a‑Time Testing
When multiple sticks are installed, the “one‑stick‑at‑a‑time” method is invaluable. Power down the system, remove all modules, and install a single stick in the primary slot (usually DIMM A1). Run MemTest86 for a full three‑pass cycle. If the test passes, swap in the next stick, repeating the process. A failing stick will consistently produce errors regardless of its position. Conversely, if all sticks pass individually but the system crashes when all are populated, the issue likely lies in the motherboard’s channel handling or a subtle timing conflict. In that case, experiment with different slot pairings, or consider a BIOS setting that forces the memory controller into a more conservative mode. Document each configuration in a log—this habit saved me countless hours during a recent upgrade where the new 32 GB kit only misbehaved when both channels were populated.
When RAM Issues Mimic GPU Failures
It’s easy to misattribute symptoms to the graphics card, especially when you see visual artifacts or crashes in 3D applications. However, insufficient or unstable RAM can starve the GPU of data, causing similar behavior. If you’re experiencing crashes in demanding titles, check the RAM health first before diving into the GPU troubleshooting guide. For an in‑depth look at graphics‑related crashes, see my article Why Your Video Card Keeps Crashing and How to Stop It. In my own experience, a single faulty DDR5 stick caused my RTX 4090 to report “device lost” errors during intensive rendering. Once the memory module was replaced, the GPU returned to flawless operation, underscoring how intertwined these components truly are.
Balancing Memory with Massive Storage: A Power‑User Perspective
Even with abundant RAM, power users still rely heavily on fast storage for paging and large dataset handling. In 2026, while NVMe SSDs dominate the primary drive market, many of us keep high‑capacity hard drives for archival workloads—a strategy I discuss in Hard Drives Still Rule. The key is to ensure that your system’s memory hierarchy—cache, RAM, and storage—communicates seamlessly. If RAM errors cause frequent pagefile writes, you’ll see unnecessary wear on your SSDs and performance degradation on your HDDs. Monitoring tools like Windows Performance Monitor can highlight spikes in page file usage; a sudden increase often hints at underlying memory instability. By maintaining healthy RAM, you protect not only the processor but also extend the life of your storage ecosystem.
Future‑Proofing Your Memory Strategy
Looking ahead, the next wave of DDR5‑E (Enterprise) modules promises capacities up to 256 GB per stick with built‑in error correction, targeting AI and cloud workloads. While these are still premium options, they’re becoming viable for enthusiasts who want to future‑proof their rigs. When planning an upgrade, consider the motherboard’s upgrade path: does it support the higher density DIMMs and the necessary power delivery? My guide on Future‑Proof PC Upgrades outlines the essential criteria. In the meantime, maintain a regular testing cadence—run MemTest86 quarterly, keep BIOS firmware up to date, and schedule a physical inspection during your annual system clean‑up. By treating RAM health as an ongoing maintenance task rather than a one‑off fix, you’ll keep your workstation humming at peak performance for years to come.




