
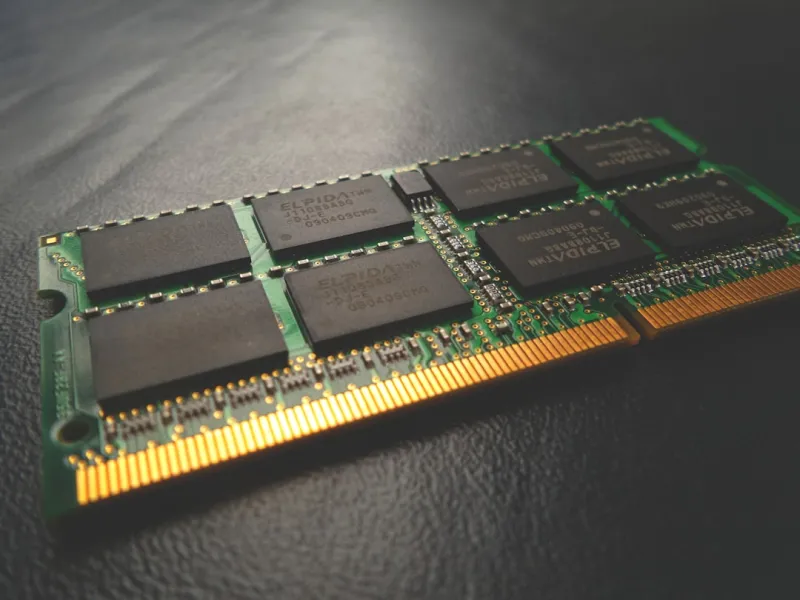
When my workstation in 2026 started throwing random “Application has stopped responding” dialogs, the first thing I checked was the memory. As a power‑user who lives on the edge of AI‑driven workloads and massive multitasking, RAM is the bloodstream that keeps everything flowing. In the past, a simple reboot or a quick reseat of the modules would do the trick, but today’s DDR6‑compatible platforms demand a more surgical approach. In this post I’ll walk you through the modern memory landscape, the tell‑tale symptoms that point to a failing stick, and a step‑by‑step diagnostic routine that blends old‑school tools with the latest firmware tricks. Whether you’re a developer juggling containers, a gamer hunting the highest frame‑rates, or a content creator rendering 8K video, the strategies here will help you isolate, verify, and resolve RAM issues before they cripple your productivity. Let’s demystify the memory stack, so you can spend less time troubleshooting and more time getting work done.
Understanding the 2026 RAM Ecosystem
The market today is dominated by DDR5‑5600 and the emerging DDR6‑7200 modules, each promising higher bandwidth and lower latency. However, the jump in raw speed brings new complexities: tighter timing tolerances, on‑die ECC for consumer chips, and a proliferation of “XMP‑3” profiles that can push the hardware to its limits. Many power‑users opt for mixed‑capacity kits to balance cost and performance, but the risk of sub‑optimal pairing rises dramatically when you combine modules from different manufacturers or generations. In addition, modern motherboards expose granular control over memory voltage, command rate, and even per‑channel training, meaning a misconfiguration can masquerade as a faulty stick. To navigate this terrain, you need to grasp not just the specifications on the label, but how those specs interact with your CPU’s integrated memory controller (IMC) and the BIOS/UEFI’s memory training algorithms. This foundational knowledge will make the later diagnostic steps more meaningful and prevent you from chasing phantom problems.
Symptoms That Signal Memory Trouble
Random crashes, blue screens, and unexplained freezes are classic red flags, but there are subtler cues that often get overlooked. If you notice that large file transfers stall mid‑process, or that virtual machines become sluggish after a few hours, the culprit may be a failing RAM module that is struggling under sustained load. Similarly, a system that boots quickly but then slows dramatically after a software update could be experiencing “memory leakage” due to faulty ECC checks. In benchmark tests, a dip of 5‑10% in synthetic scores is usually within normal variance, but if you see a consistent drop across multiple suites, it’s time to suspect memory. Also pay attention to audible clicks or subtle coil whine from the DIMM slots, which can indicate poor contact or voltage spikes. Documenting these symptoms before you begin troubleshooting helps you track whether the issue improves after each intervention, turning guesswork into a data‑driven process.
Preparing Your Toolkit: Software and Firmware Essentials
Before you open the case, arm yourself with the right software. Windows 11’s built‑in Memory Diagnostic Tool (MDiag) is a quick sanity check, but for a deep dive you’ll want to run MemTest86 from a bootable USB, which now supports DDR6 testing and reports on on‑die ECC errors in real‑time. On Linux, the stress-ng utility can stress test specific memory channels, while macOS power‑users can leverage memtest via Homebrew. Don’t forget to update your motherboard’s BIOS/UEFI to the latest version; manufacturers often release memory‑training patches that resolve compatibility quirks with newer DIMMs. While you’re updating, take a moment to explore the “Advanced Memory Settings” page—this is where you’ll enable or disable XMP profiles, adjust voltage, and set the command rate. For a broader hardware perspective, see Mastering Modern Computer Hardware, which outlines how memory interacts with CPUs and storage subsystems in today’s power‑user builds.
Step‑by‑Step Diagnostic Process
Start with a visual inspection: power down, unplug, and check that each DIMM is fully seated, with the locking clips firmly engaged. If you have a multi‑channel kit, note the slot configuration recommended by the motherboard manual—often alternating slots (e.g., A2 and B2) for dual‑channel operation. Next, run a quick MemTest86 pass (at least one full cycle) with all modules installed. If errors appear, record the address and error type; this can help pinpoint which stick is at fault when you test modules individually. Remove all but one module and repeat the test; if the single stick passes, swap it with the next module and run again. Continue this process until you isolate the problematic DIMM or confirm that all sticks are clean. While you’re at it, monitor the system’s voltage rails using a hardware monitor like HWInfo, ensuring that the DRAM voltage stays within the manufacturer’s specified range (usually ±5%). Any spikes may indicate a power delivery issue rather than a defective module.
BIOS/UEFI Tweaks That Can Save a Bad Day
Often, what looks like a faulty stick is actually a timing mismatch. In the BIOS, disable the “Auto‑OC” (over‑clock) feature and manually set the memory frequency to the JEDEC standard rating (e.g., 4800 MHz for DDR5‑4800) rather than the higher XMP profile. Reduce the CAS latency by one step if the system remains stable, but watch for errors. Enabling “Memory Scrub” can help the IMC correct single‑bit errors on the fly, reducing the likelihood of a crash during heavy workloads. If your board supports per‑channel voltage control, slightly raise the voltage on the channel that houses the problematic DIMM—sometimes a 0.05 V bump resolves borderline stability without over‑volting the entire system. Remember to save a baseline profile before making changes, so you can revert quickly if the system becomes unstable. These adjustments are especially crucial when you’re pushing the envelope with AI model inference on a consumer‑grade platform.
Compatibility Checks: Timings, Voltage, and CPU Limits
Even if the BIOS reports that a module is “compatible,” the CPU’s integrated memory controller may have its own constraints. AMD’s Zen 4 and Intel’s Alder Lake‑S series, for instance, have different optimal timings for DDR5 versus DDR6. Use the CPU vendor’s memory compatibility list as a reference, and cross‑check it against the module’s SPD data using tools like CPU‑Z. Pay attention to the “tRCD,” “tRP,” and “tRAS” values; mismatched timings across modules can cause the IMC to fall back to the lowest common denominator, throttling performance. Voltage mismatches are another silent killer—some high‑density DDR6 sticks require 1.45 V, while the motherboard’s default may be set for 1.35 V. A mismatch can lead to sporadic errors that only surface under load. When in doubt, consult the motherboard’s documentation, such as the guide on The Motherboard Revolution, to ensure your memory configuration aligns with the platform’s capabilities.
When to Replace vs. When to Upgrade
After isolating a faulty module, the decision to replace or upgrade hinges on your workload demands and budget. If a single stick fails the MemTest86 stress test, a replacement with an identical model restores stability with minimal cost. However, if you’re consistently hitting the memory bandwidth ceiling in AI training or 8K video editing, consider moving to a higher‑speed DDR6 kit with tighter timings. Upgrading also presents an opportunity to enable “dual‑rank” configurations, which can improve throughput on platforms that benefit from additional bank groups. Keep an eye on warranty terms; most reputable manufacturers offer a 5‑year guarantee, but you’ll need the original purchase receipt. In the meantime, enable Windows’ “Page File” on a fast SSD to cushion temporary memory shortages, but treat it as a stopgap rather than a permanent solution.
Future‑Proofing: DDR6 and Emerging LPDDR5X Options
Looking ahead, DDR6 is set to become the mainstream standard for high‑performance desktops, while LPDDR5X is carving out a niche in ultra‑thin workstations and laptops that need low‑power, high‑bandwidth memory. DDR6 brings native support for 2.5 Gbps per pin and integrated on‑die ECC, which can reduce the incidence of silent data corruption. If you’re building a new rig, prioritize a motherboard with a robust “Memory Over‑Ride” feature that lets you fine‑tune timings beyond the XMP specifications. Also, consider the thermal design: DDR6 modules often run hotter, so a good airflow path or a heatsink can stave off throttling. As you plan for future upgrades, keep an eye on the “DIMM slot density”—some boards now support up to 64 GB per slot, allowing for massive total capacities without sacrificing channel balance.
Performance Tuning for the Power‑User
Beyond stability, many power‑users chase every ounce of performance. Once your memory passes all diagnostic tests, you can experiment with “Memory Over‑Clocking” (MOC). Start by enabling the XMP profile, then incrementally raise the frequency by 200 MHz steps, running a full MemTest86 cycle after each tweak. Watch for error spikes; a slight increase in corrected errors is acceptable if the workload gains a measurable boost. Adjust the “Command Rate” from 2T to 1T if your motherboard supports it, but be prepared for occasional instability on the first try. Pair your memory tweaks with CPU power‑limit adjustments in the BIOS, as the memory controller’s performance is often tied to the CPU’s boost behavior. Finally, benchmark with real‑world tools—run a rendering test in Blender, train a small TensorFlow model, or stream a 4K game—to ensure the theoretical gains translate into practical improvements.
Wrapping Up and Resources
Memory troubleshooting in 2026 is a blend of old‑school diligence and modern firmware finesse. By following a systematic inspection, leveraging robust testing tools, and fine‑tuning BIOS settings, you can quickly identify whether a RAM module is at fault or simply misconfigured. Remember to keep your firmware up to date, respect the compatibility matrices outlined in your motherboard’s manual, and use the diagnostic data you collect to make informed decisions about replacements or upgrades. For deeper dives into related hardware topics, explore our other guides on power‑user strategies, such as Unlocking AI Computing. Armed with these tactics, you’ll keep your system humming, your workloads uninterrupted, and your peace of mind intact.




