
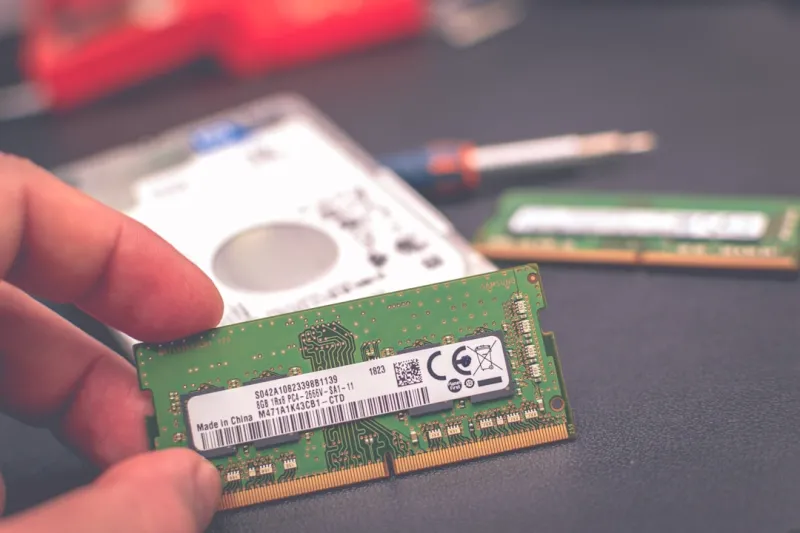
When my workstation hiccups with a sudden slowdown, the first thing I suspect is memory. In 2026 the sheer bandwidth demanded by AI‑assisted workloads, 4K video editing, and real‑time simulations makes RAM the most vulnerable bottleneck. You’ll notice the classic signs: random freezes, blue screens that whisper “MEMORY_MANAGEMENT”, inexplicable application crashes, and a sluggishness that feels like you’re running on a decade‑old laptop. The tricky part is that these symptoms often masquerade as software bugs, driver issues, or even a temperamental SSD. As a power‑user, I’ve learned to treat each glitch as a potential memory red flag, because the cost of a misdiagnosed RAM problem is wasted hours and a compromised workflow. In this article I’ll walk you through a systematic, no‑nonsense approach that blends tried‑and‑true hardware checks with the latest diagnostic tools, all while keeping an eye on the evolving demands of modern software.
Why Modern Systems Stress Memory Differently
Today's operating systems and applications are engineered for parallelism. Windows 11’s memory compression, Linux’s cgroups, and macOS’s unified memory architecture all try to hide RAM scarcity, but they also create new failure modes. AI‑driven features in Photoshop, real‑time ray tracing in games, and containerized dev environments all allocate memory aggressively, often in bursts that exceed the traditional “steady‑state” expectations. Moreover, DDR5‑5600 modules and LPDDR5X on laptops introduce higher frequencies and tighter timings, which can expose subtle timing mismatches on older motherboards. The Mastering Motherboard Selection guide explains how voltage regulation and trace design matter more than ever. Understanding these pressures helps you anticipate when a memory upgrade is a necessity versus a nice‑to‑have, and informs the diagnostic steps you’ll take later in the process.
Step‑by‑Step Diagnostic Routine
Before you pop open the case, start with software‑level checks. Windows’ built‑in Memory Diagnostic (mdsched.exe) has been updated for 2026 to better handle DDR5 error logging. Run it from a clean boot environment and note any “Pass” or “Fail” results. Next, employ third‑party utilities like MemTest86+ or the open‑source Prime95 “Blend” test, which stress different address patterns and can uncover intermittent failures. If the tests flag errors, you’ve got a clear culprit; if not, you’ll need to move to the hardware inspection. Keep a log of each test’s duration, temperature readings, and any observed system behavior. This disciplined record‑keeping mirrors the approach in Diagnosing and Fixing RAM Problems: A Power‑User’s Playbook, ensuring you have evidence to share with support or to validate a replacement.
Physical Inspection
Power‑users often skip the basics, but a visual check can save you from chasing ghosts. Turn off the PC, unplug it, and ground yourself to avoid static discharge. Look for bent or broken pins on the RAM slots, dust buildup that can cause overheating, and any discoloration that hints at overheating. If you spot a module that’s not seated flush, gently reseat it, applying even pressure on both ends. While you’re there, verify that the DIMM slots are configured according to the motherboard’s recommended dual‑channel or quad‑channel layout. Misaligned configurations can halve the effective bandwidth, making a perfectly healthy stick appear sluggish. After reseating, run the software tests again to see if the issue resolves.
BIOS/UEFI Settings That Influence Stability
The firmware layer holds the keys to memory stability. In 2026, most UEFI interfaces expose advanced options like XMP (Extreme Memory Profile) or DOCP for AMD platforms. Enabling XMP automatically sets the module’s rated frequency, timings, and voltage, but it can also push the memory beyond what the motherboard’s VRM can reliably supply. If you’re experiencing crashes after a recent BIOS update, revert to JEDEC standard timings (usually 2133 MHz for DDR4 or 4800 MHz for DDR5) and manually fine‑tune voltage in small increments—often a 0.05 V bump can make the difference between a pass and a failure. Remember to save the profile and perform a cold reboot; warm reboots sometimes retain residual settings that mask underlying issues.
Evaluating System Load and Memory Utilization
Even perfectly healthy RAM can be overwhelmed by software that leaks memory or spawns runaway processes. Use Task Manager’s “Memory” tab or Linux’s “htop” to identify processes that consume unusually high private bytes. In 2026, many AI‑enhanced applications allocate memory dynamically, and a misconfigured cache can balloon to several gigabytes. Set performance counters to track “Commit Charge” over time; a steady upward trend without a corresponding release suggests a leak. If you pinpoint the offender, update the software, adjust its configuration (e.g., lower the AI model size), or isolate it in a container with capped resources. This proactive monitoring complements the hardware checks and often prevents future RAM‑related headaches.
When to Replace vs. When to Reseat
After exhausting diagnostic tests and firmware tweaks, you’ll need to decide if the module itself is at fault. If a single stick consistently fails in MemTest86+ across multiple slots, it’s time for a replacement. However, if errors appear only when the module is paired with a specific DIMM, you may be dealing with a compatibility issue—perhaps the motherboard’s BIOS doesn’t fully support the module’s density or rank configuration. In such cases, consult the Designing a Future‑Ready PC guide for recommended memory kits that play nicely with the latest chipsets. Keep receipts and warranty information handy; many manufacturers offer a “no‑questions‑asked” RMA for memory that fails under standard testing conditions.
Future‑Proofing Your Memory Strategy
Looking ahead, the trend in 2026 is toward higher capacity, lower latency modules that integrate error‑correcting code (ECC) even on consumer platforms. While ECC has traditionally been reserved for workstations and servers, newer CPUs now support it on mainstream motherboards, providing an extra safety net against silent data corruption. If you anticipate workloads like large language model fine‑tuning or 8K video rendering, consider a 64 GB or 128 GB kit with ECC support, paired with a robust VRM design. Also, keep an eye on the emerging DDR6 standard, slated for early 2027 releases; early adopters are already testing it in prototype rigs. By aligning your memory roadmap with these developments, you’ll minimize the need for disruptive upgrades and keep your system humming smoothly for years to come.
Wrapping Up: A Power‑User’s Mindset
Troubleshooting RAM isn’t just about swapping sticks; it’s about cultivating a systematic, data‑driven mindset that anticipates how software trends will stress hardware. As a power‑user, you’re the first line of defense against performance degradation, and the steps outlined here empower you to diagnose with confidence, intervene intelligently, and plan for future demands. Whether you’re a developer juggling containers, a creator rendering ultra‑high‑resolution footage, or a gamer chasing the highest frame rates, mastering memory health is a non‑negotiable part of your toolkit. Keep this playbook handy, stay current with firmware releases, and remember that a disciplined approach today saves you countless hours of frustration tomorrow.




