
When I first started tearing apart high‑end workstations for my own side projects, I quickly learned that memory isn’t just a silent partner—it’s the pulse that drives every compute‑intensive task. A sudden crash while rendering 4K video, a lag spike in a massive spreadsheet, or a mysterious “STOP 0x00000124” blue screen can all be traced back to RAM misbehaving under pressure. In 2026, with DDR5 modules hitting the mainstream and AI‑enhanced workloads demanding ever‑larger working sets, the margin for error shrinks dramatically. That’s why I treat every memory glitch as a forensic case: I gather symptoms, isolate variables, and then apply a repeatable methodology that any power‑user can follow. In this guide, I’ll walk you through that exact process—from the tell‑tale signs that your system is struggling, to the low‑level diagnostics that reveal faulty chips, and finally to the upgrade decisions that keep your rig future‑proof. Whether you’re a seasoned developer, a content creator, or just someone who refuses to settle for “it’s probably Windows,” these steps will help you turn RAM headaches into a thing of the past.
Symptoms and First‑Level Checks
Before you open your case, take a moment to catalog exactly what’s going wrong. Is the system rebooting during a specific application launch? Do you notice random freezes when multitasking between a VM and a heavy IDE? Are there frequent “out of memory” alerts even though the Task Manager shows plenty of free RAM? In 2026, Windows’ built‑in Resource Monitor and Performance Analyzer have become more granular, letting you spot spikes in “Committed Memory” that often precede a crash. Pay close attention to any pattern: a particular time of day, after a Windows update, or when a new peripheral is attached. These clues help you determine whether the problem is truly hardware‑related or a software conflict masquerading as a memory issue. Documenting the symptoms not only speeds up troubleshooting but also provides a baseline for later comparison after you’ve applied fixes.
Physical Inspection and Slot Configuration
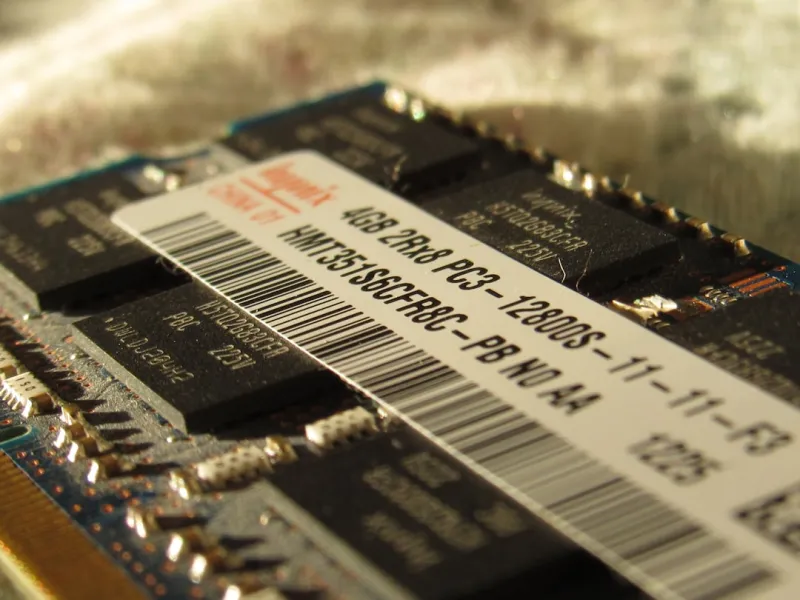
Once you’ve gathered symptom data, it’s time to get hands‑on. Power down the PC, unplug it, and ground yourself to avoid static discharge. Open the chassis and visually inspect each DIMM for discoloration, bent pins, or dust buildup—common culprits that can cause intermittent contacts. While you’re there, verify that the modules are seated firmly; a loose stick can cause the system to think a slot is empty, triggering fallback to slower single‑channel mode. Check your motherboard’s manual (or the online PDF) to confirm you’re populating the correct slots for dual‑channel operation; many boards label them “DIMM A2” and “DIMM B2” for optimal performance. If you have mixed‑capacity sticks, ensure they’re paired correctly; mismatched capacities can force the system into asymmetric mode, which can degrade performance under load. Finally, take note of the module’s label—speed (e.g., 5600 MHz), latency (CL36), and voltage. Having this physical inventory will be essential when you move on to BIOS verification and software testing.
BIOS/UEFI Settings and XMP Profiles
The next layer of diagnostics lives inside the BIOS or UEFI firmware. Modern 2026 motherboards automatically detect DIMM speed, but they often default to conservative JEDEC timings for stability. To unleash the full potential of your DDR5 sticks, enable the XMP (Extreme Memory Profile) or the newer EXPO profile if you’re on an AMD platform. This tells the firmware to apply the manufacturer‑specified frequency, timings, and voltage—typically 5600 MHz, CL36, and 1.35 V for high‑end kits. However, be cautious: over‑aggressive profiles can cause instability, especially if your power delivery isn’t robust. Use the BIOS “Memory Health” or “SPD” view to confirm that the advertised values match what’s being applied. If you notice frequent “Memory Training” errors during boot, try manually setting the voltage a few millivolts higher or loosening the latency by one step. Remember to save a baseline profile before making changes, so you can revert quickly if the system fails to POST.
Software‑Based Diagnostics: From Windows Tools to Bootable Suites
Even with perfectly seated modules and correct BIOS settings, hidden faults can linger. Windows 11’s built‑in Memory Diagnostic is a quick first step: run it from the Start menu, let it reboot, and watch for error codes. For deeper analysis, I recommend flashing a USB with MemTest86 — the 2026 version supports DDR5’s high frequencies and can run extended tests across all address ranges. Boot into the utility, select “Test All” and let it run for at least 8 passes; any failure typically points to a defective chip or a timing mismatch. Additionally, tools like HWiNFO can monitor real‑time memory bandwidth and error counters while you stress the system with a synthetic workload such as Prime95’s “Blend” test. Keep an eye on the “ECC Errors” column (even on non‑ECC modules, the firmware may log corrected errors) and on “Memory Utilization” spikes that exceed 95% for prolonged periods—these are red flags that the RAM can’t keep up with demand.
Common Pitfalls: Mismatched Timings, Voltage, and Dual‑Channel Nuances
Power‑users often chase the highest advertised speed without checking compatibility, leading to subtle performance degradation. Mixing DDR5 modules from different manufacturers, or even different product lines from the same brand, can introduce latency mismatches that force the controller into a “best‑effort” mode, effectively lowering the entire kit’s performance. Similarly, using a 1.2 V voltage setting on a kit rated for 1.35 V will cause the modules to downclock or produce errors under load. Dual‑channel isn’t just about installing two sticks; the memory controller expects paired modules with identical capacity, speed, and timing. If you inadvertently install a 16 GB stick alongside a 32 GB stick, the system will operate in asymmetric mode, which can cause unpredictable latency spikes. Always verify that your memory configuration matches the motherboard’s recommended pairing scheme, and consider using a memory‑matching tool like the “Memory Configurator” on the manufacturer’s website before purchasing.
When to Upgrade: Balancing Capacity, Speed, and Future‑Proofing
If diagnostics confirm a hardware fault or you’ve outgrown your current capacity, it’s time to plan an upgrade. In 2026, most power‑users find that 32 GB is the sweet spot for AI‑assisted workloads, while 64 GB is reserved for intensive data‑science pipelines or large‑scale VM farms. However, speed matters just as much as capacity; a 64 GB kit running at 4800 MHz can outperform a 32 GB kit at 5600 MHz in latency‑sensitive tasks. To guide your decision, I often reference the Power‑User upgrade playbook, which breaks down cost‑per‑gigabyte, latency impact, and motherboard compatibility charts. Before you buy, double‑check that your board supports the intended frequency and that the VRM can handle the increased power draw. If you’re already pushing the limits of your CPU’s memory controller, consider a motherboard refresh that offers better power delivery and more robust BIOS tuning options.
Designing a Future‑Ready System: DDR5, Capacity Planning, and the Bigger Picture
Looking ahead, the next generation of DDR5 modules promises 6400 MHz and beyond, with tighter timings that can squeeze out additional performance in AI inference and real‑time rendering. To avoid another upgrade cycle in a year or two, I recommend building with headroom: opt for a motherboard that supports at least 128 GB total capacity and has extra DIMM slots for staged upgrades. Pair this with a quality power supply that delivers clean 12 V rails, as memory voltage stability is critical for high‑frequency operation. For a comprehensive roadmap, the future‑ready PC guide provides a deep dive into component selection, thermal design, and modular upgrade paths that keep your rig competitive for the next five years. Remember, a well‑balanced system—CPU, GPU, storage, and memory working in harmony—delivers more real‑world performance than the flashiest single component alone.
Putting It All Together: A Step‑by‑Step Playbook for RAM Mastery
To recap, start by documenting symptoms, then perform a visual inspection, verify BIOS settings, run thorough software tests, and finally evaluate whether you need a replacement or an upgrade. Each step builds on the previous, ensuring you don’t overlook a simple fix before ordering new hardware. For those who prefer a checklist format, I’ve distilled this entire process into a concise workflow in the step‑by‑step RAM playbook. Keep that page bookmarked; it’s the perfect reference when you’re in the middle of a critical deadline and the system decides to throw a memory tantrum. By mastering these techniques, you’ll not only eliminate downtime but also gain the confidence to push your PC’s limits—whether you’re training AI models, editing 8K footage, or simply enjoying a buttery‑smooth gaming experience. Happy troubleshooting, and may your memory be ever stable!




