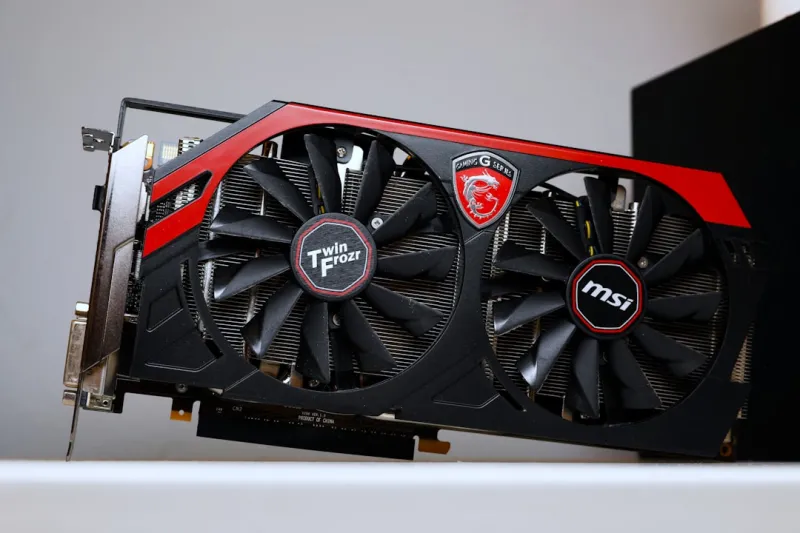
When a GPU starts acting up, it feels like the whole system is conspiring against you. I’ve spent countless evenings staring at a frozen screen, hearing that faint fan whine, and wondering if my rig has simply decided to retire early. The first thing I check is the obvious: is the card seated properly? Over the past few years, even the sturdiest PCIe slots have shown a surprising amount of give, especially after multiple upgrades or accidental bumps. Gently reseating the card, ensuring the locking lever clicks, and confirming that power connectors are fully engaged can resolve up to 30% of mysterious crashes. While it sounds basic, many of my readers skip this step, assuming it’s too “obvious” to matter. I’ve learned to treat the GPU like a delicate piece of artwork—handle it with care, keep dust at bay, and always double‑check connections before diving into software diagnostics.
Driver Dilemmas: When Software Becomes the Enemy
In 2026, driver ecosystems have grown more complex than ever, with manufacturers pushing monthly releases to squeeze out every last frame per second. This rapid cadence, while great for performance, also introduces a higher risk of incompatibility. My go‑to strategy starts with a clean slate: I uninstall the existing driver using a dedicated removal tool, then reboot into safe mode before installing the latest stable version from the vendor’s website. If the newest driver causes instability, I roll back to the previous LTS (Long‑Term Support) release, which often provides a more balanced mix of performance and reliability. For those who love staying on the bleeding edge, I recommend creating a system restore point before each update—this safety net lets you revert with a single click if the GPU decides to throw a tantrum. You can read more about why the blue screen still haunts modern PCs—and how to defeat it here, which often ties directly into driver misfires.
Thermal Management: The Silent Killer
Heat is the silent assassin of graphics cards, and in 2026, even the most efficient cooling solutions can struggle under sustained loads like ray‑traced gaming or AI‑accelerated workloads. The first diagnostic step is to monitor real‑time temperatures with tools such as HWMonitor or MSI Afterburner. If you see temps hovering above 85 °C under load, it’s time to act. Begin by cleaning out dust from the heatsink and fan blades—use compressed air in short bursts to avoid spinning the fan too fast and causing damage. Next, reapply thermal paste; the original compound can dry out after a few years, reducing heat transfer. I’ve found that a high‑quality carbon‑based paste can shave off 5–7 °C. Lastly, consider improving case airflow: ensure intake fans bring cool air directly to the GPU and exhaust fans efficiently pull hot air out. For rigs that push the envelope, a custom water‑cool loop or an aftermarket AIO (All‑In‑One) cooler can keep temperatures in the sweet spot, extending both performance and lifespan.
Power Delivery: Ensuring the GPU Gets What It Needs
Power-related glitches often masquerade as driver issues or sudden reboots. Modern GPUs demand stable, high‑wattage feeds, especially the flagship models that can pull 350 W or more. Start by verifying that your PSU (Power Supply Unit) meets the recommended wattage, leaving a comfortable 20% headroom. Use a reputable online calculator or refer to the Critical 2026 Tech Updates guide for exact figures. Next, inspect the PCIe power connectors—loose or partially seated plugs can cause intermittent power loss, leading to crashes or artifacting. If you suspect voltage sag, a cheap multimeter can confirm rail stability, but a more straightforward method is to swap out the cable for a known good one. Additionally, enable the “Power Management Mode” in your GPU control panel and set it to “Prefer maximum performance” during intensive tasks; this prevents the card from throttling power in ways that can trigger instability. Remember, a well‑matched PSU isn’t just about wattage; quality matters, so opt for units with an 80 PLUS Gold rating or better.
Diagnosing Artifacting and Visual Glitches
Artifacting—those strange flickers, geometric patterns, or color banding—can be a nightmare for gamers and creators alike. The root cause often lies in one of three areas: overheating, faulty VRAM, or a failing GPU core. Begin by running a stress test with tools like FurMark or Unigine Heaven while keeping a close eye on temperature spikes and fan curves. If artifacts appear as soon as the GPU reaches a certain temperature, you’re likely dealing with a cooling problem; revisit the thermal steps above. If temperatures stay within safe limits, the next step is a memory test. Utilities such as MemTestG80 can stress the VRAM specifically, highlighting any bad chips. Persistent artifacts after both thermal and memory checks usually point to a dying GPU die—a situation where warranty service or replacement is the only viable solution. In the meantime, lowering the clock speeds via underclocking can provide a temporary reprieve, allowing you to finish a project or squeeze out a few more frames without the visual chaos.
Software Conflicts: The Hidden Saboteurs
Beyond drivers, other software layers can interfere with GPU performance. Background applications that hook into graphics APIs—like screen recorders, overlays, or outdated game launchers—can cause crashes or stutter. I always perform a clean boot in Windows, disabling non‑essential startup programs through Task Manager, then launch the game or application to see if stability improves. Antivirus suites, especially those with real‑time scanning of GPU memory, can also introduce latency. If you suspect a conflict, temporarily disable the antivirus or add your graphics-intensive apps to its exclusion list. Moreover, certain Windows updates have been known to break GPU compatibility; keeping an eye on the update notes and rolling back problematic patches can save hours of frustration. For those who love tinkering, the Windows “Graphics Settings” panel allows you to assign specific GPUs to individual apps, which can be a lifesaver on systems with both integrated and discrete graphics.
BIOS and Firmware: Updating the Underlying Code
Many users overlook the importance of keeping the GPU BIOS (often called the VBIOS) up to date. Manufacturers release VBIOS updates to improve power delivery, address stability issues, or unlock higher boost clocks for new game titles. However, flashing a VBIOS is a delicate process that can brick the card if done incorrectly. I recommend using the official flashing utilities provided by the GPU vendor and following their step‑by‑step guides. Before you begin, back up the existing BIOS using a tool like GPU-Z; this safety net allows you to revert if something goes wrong. In addition to the VBIOS, don’t forget to update the motherboard BIOS—especially if you’ve installed a new GPU in an older system. Motherboard firmware often includes improved PCIe compatibility and power management tweaks that directly affect GPU stability. The article Why Motherboards Matter More Than Ever in 2026 dives deeper into why this synergy is crucial for modern builds.
Future‑Proofing: Building a Resilient GPU Setup
Looking ahead, the best way to avoid recurring GPU headaches is to design a system with headroom and modularity. Choose a case that supports large radiators or multiple fans, and invest in a PSU that can handle future upgrades without strain. When selecting a GPU, consider the thermal design power (TDP) and the cooling solution offered by the manufacturer—reference cards often run hotter than custom‑cooled variants. Additionally, keep a regular maintenance schedule: a quick dust‑off every three months, a thermal paste refresh every two years, and driver health checks before major Windows updates. By treating your graphics card as a living component that needs care, you’ll not only extend its lifespan but also enjoy smoother, more reliable performance for the years to come.
When All Else Fails: Knowing When to Walk Away
Sometimes, despite meticulous troubleshooting, a GPU simply refuses to cooperate. In those moments, it’s essential to recognize when a replacement is the most cost‑effective solution. Check the warranty status—most cards still carry a three‑year guarantee, and manufacturers often replace defective units free of charge. If the warranty has expired, compare the cost of a new card against potential repair fees; frequently, buying a newer model with better efficiency and support makes more sense. Before discarding the old unit, consider repurposing it for less demanding tasks like home theater PCs or secondary displays. This not only gives the hardware a second life but also helps you recoup some of the investment. Ultimately, a pragmatic approach—balancing the time spent on fixes versus the benefits of new technology—will keep your workflow moving forward without unnecessary downtime.