
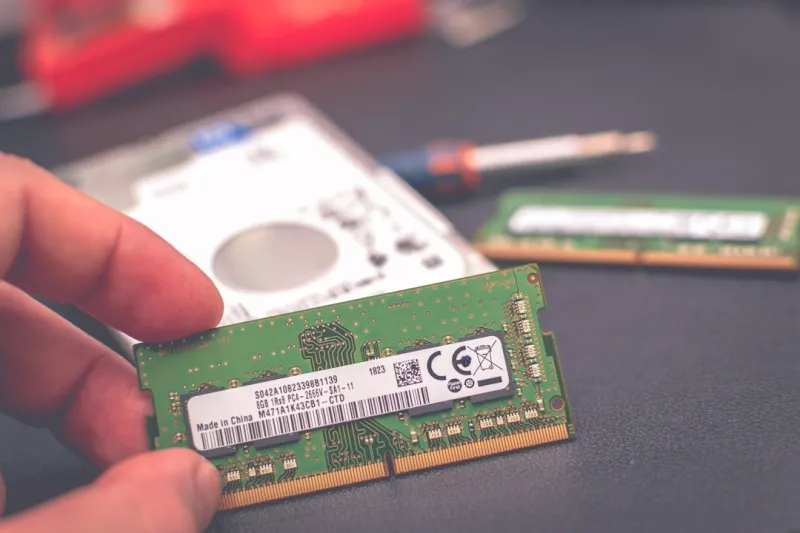
When you’ve built a high‑performance workstation in 2026, RAM isn’t just a silent workhorse—it’s the pulse that keeps every AI model, container, and virtual machine breathing in sync. Yet, even the most meticulous power users find themselves staring at cryptic freezes, sudden restarts, or those dreaded blue screens that feel like a personal affront. In my years of tinkering—from the early DDR3 days to the cutting‑edge DDR6 modules of today—I've learned that RAM issues often masquerade as software glitches, making diagnosis a game of patience and precision. This guide walks you through the modern, systematic approach to RAM troubleshooting, blending time‑tested techniques with the latest diagnostic utilities that every power user should have bookmarked. Whether you’re fine‑tuning a 128 GB workstation for deep‑learning workloads or simply ensuring your gaming rig runs buttery smooth, understanding how to isolate, test, and resolve memory problems will keep your system humming at its peak.
Recognizing the Symptoms of Faulty Memory
Before you dive into any toolset, you need to spot the tell‑tale signs that point directly to RAM. Random application crashes, especially in memory‑intensive programs like video editors or AI inference engines, are classic red flags. More ominously, the infamous “Memory Management” stop code on a blue screen—yes, that still matters—signals that the OS detected an unrecoverable error at the hardware level. You might also notice subtle performance degradation: longer load times, jittery frame rates, or even inexplicable data corruption in large files. For power users who push their machines to the limit, these symptoms often surface under stress tests or multi‑tasking bursts. Keep a log of when and how the issue appears; the pattern can narrow down whether the culprit is a single stick, a specific DIMM slot, or an incompatibility with your motherboard’s firmware. Remember, a seemingly stable system can harbor latent memory faults that only reveal themselves after hours of heavy computation.
Essential Diagnostic Tools in the 2026 Toolbox
Windows’ built‑in Memory Diagnostic is a decent starting point, but for the depth we demand today, third‑party utilities reign supreme. Mastering Modern Computer Hardware recommends MemTest86+ as the gold standard—its EFI boot mode and exhaustive test patterns can uncover subtle timing errors that Windows often misses. Pair this with the open‑source stressor stress‑ng, which lets you hammer the memory subsystem while monitoring temperature and voltage via HWInfo. For those running Linux, the memtester command line utility provides granular control over block sizes and test passes. Don’t overlook the utility built into many UEFI BIOS interfaces; a quick “Memory Test” from the firmware menu can verify that the RAM operates correctly before any OS drivers load. Whichever tool you choose, run multiple passes—ideally overnight—to catch intermittent failures that only appear under sustained load.
Physical Inspection: The First Line of Defense
Even the most sophisticated software can’t compensate for a loose or dirty connector. Start by powering down, unplugging, and grounding yourself before you touch any component. Remove each DIMM module one at a time, inspecting the gold contacts for oxidation or debris; a gentle clean with a lint‑free cloth and isopropyl alcohol can restore proper conductivity. When you reseat the sticks, ensure they click firmly into the notches—some motherboards have a “single‑sided” locking mechanism that can be deceptive. While you have the system open, check for any signs of physical damage: cracked solder joints, bent pins, or bulging capacitors on the RAM itself. It’s also wise to verify that your case airflow isn’t creating hot spots around the memory slots, as thermal stress can exacerbate timing issues. A quick visual and tactile audit often resolves issues that would otherwise send you down a rabbit hole of software debugging.
Compatibility and Configuration: BIOS, XMP, and Beyond
Modern platforms offer a bewildering array of memory configurations—dual‑channel, quad‑channel, even octa‑channel layouts—each with its own performance implications. Begin by confirming that your motherboard’s QVL (Qualified Vendor List) includes the exact model and capacity of your RAM; while “any DDR5 will work” is a common mantra, mismatched timings can cause instability under load. Dive into the BIOS and enable the XMP (Extreme Memory Profile) that matches your kit’s rated speed and latency; however, be prepared to dial back to JEDEC defaults if you encounter errors. In 2026, many boards also support “Memory Training” features that automatically adjust voltage and timing—enable these for the best balance between stability and performance. Don’t forget to verify that your CPU’s memory controller supports the total bandwidth you’re attempting; a mismatch here can manifest as intermittent freezes that are deceptively hard to trace back to RAM.
Overclocking Pitfalls: Stress‑Testing Your Sweet Spot
Power users love to push the envelope, and memory overclocking is a popular avenue for extracting that extra gigaflop of performance. Yet, every MHz you add raises the risk of timing violations, especially on high‑density modules where signal integrity becomes a challenge. When you experiment with higher frequencies, start with a modest increase—perhaps 200 MHz above the base—and run a full MemTest86+ suite. Incrementally raise the voltage only within the manufacturer’s recommended ceiling; over‑volting can shorten the lifespan of the DRAM cells. Keep an eye on the system’s thermal envelope; even if the RAM itself doesn’t get hot, the surrounding VRM and CPU can suffer, leading to cascading failures. If you notice errors, back off to the previous stable setting and consider enabling “Command Rate 2T” or adjusting the CAS latency—small tweaks that often restore stability without sacrificing much speed.
Firmware Updates: The Unsung Heroes of Memory Stability
Motherboard manufacturers release BIOS updates not just for new CPUs but also to refine memory compatibility. In 2026, many UEFI releases include updated SPD (Serial Presence Detect) tables that improve the handshake between the BIOS and newer DRAM chips. Before you embark on any RAM upgrade, scan the vendor’s support page for a firmware version that explicitly mentions “memory stability improvements” or “enhanced XMP profiles.” Applying these updates can resolve issues that would otherwise appear as mysterious boot loops or sporadic crashes. Remember to back up your current BIOS configuration—some boards allow you to create a profile that you can restore if the new firmware introduces unexpected behavior. A clean, up‑to‑date firmware baseline is often the missing piece that turns a finicky system into a rock‑solid workstation.
When to Replace: Choosing the Right Upgrade Path
If after weeks of testing you still encounter errors, it’s time to consider a replacement. Modern DDR5 sticks now offer capacities up to 64 GB per module, making 256 GB or more configurations feasible for heavy AI workloads. When selecting new memory, prioritize kits with a proven track record on platforms similar to yours—look for community validation on forums or professional reviews. ECC (Error‑Correcting Code) memory can be a lifesaver for mission‑critical servers, but it requires a compatible CPU and motherboard, so verify that your hardware stack supports it before buying. Also, consider the future‑proofing angle: opting for a slightly higher speed than you currently need can extend the relevance of your system for several years. Pair your new RAM with a quality heatsink or heat spreader, especially if you plan to run it at higher voltages or in a compact case where airflow is limited.
Future‑Proofing Your Memory Strategy
As we look ahead, the industry is already teasing DDR6 and LPDDR6 technologies that promise higher bandwidth with lower power draw. While mainstream adoption won’t happen overnight, positioning your platform to accommodate these next‑gen modules can save you a costly overhaul later. One practical step is to select a motherboard with additional DIMM slots and robust power delivery, giving you headroom to add higher‑capacity sticks without replacing the entire board. Another is to adopt a “mixed‑generation” approach: keep a baseline of stable DDR5 while testing newer kits in secondary slots, allowing you to evaluate performance gains without risking primary workloads. For power users who juggle gaming, content creation, and AI development, this layered strategy ensures that you can seamlessly transition to emerging memory standards, keeping your rig competitive in the fast‑moving 2026 tech landscape. For a comprehensive roadmap, see Future‑Proof Your PC for detailed recommendations.
Maintaining Memory Health Over Time
Even after you’ve nailed down a stable configuration, ongoing maintenance is key to preserving RAM reliability. Schedule monthly “quick‑mem” runs using tools like MemTest86’s short test mode to catch early signs of degradation—many memory failures start as a few bad bits that gradually expand. Keep your system’s interior dust‑free; while RAM isn’t as heat‑sensitive as CPUs, excessive buildup can raise ambient temperatures, subtly affecting signal timing. If you frequently run intensive workloads, consider periodic reseating of the modules to ensure contacts stay pristine. Lastly, stay informed about firmware updates and community findings related to your specific RAM model—vendors often release micro‑code patches that address rare stability issues discovered after launch. By integrating these habits into your regular tech routine, you’ll enjoy a longer, more dependable memory lifespan, allowing you to focus on what truly matters: building, creating, and pushing the boundaries of what your machine can achieve.




