When a motherboard decides to throw a tantrum, the whole system grinds to a halt, and the frustration level spikes faster than a GPU clock under load. I’m Shawn DesRochers, and after countless nights of staring at dead LEDs and cryptic beep codes, I’ve refined a methodical, power‑user‑centric approach that cuts the guesswork out of troubleshooting. In 2026, we’re blessed with more diagnostic tools than ever—yet the fundamentals remain unchanged. This guide walks you through the exact steps I take when the heart of my rig stops beating, from the first visual scan to the final firmware flash, ensuring you can restore stability without hunting down obscure forums.
Spotting the Symptoms Before You Panic
The first rule in any motherboard rescue mission is to catalog the symptoms accurately. Does the system power on but refuse to POST? Are you hearing a single short beep, a series of long beeps, or complete silence? Is the fan spinning while the LEDs stay dark? In my experience, these clues map directly to hardware layers: power delivery, BIOS initialization, or peripheral communication. For instance, a single short beep usually signals a successful POST, while continuous beeping often points to memory errors. Conversely, no beeps at all can indicate a dead power supply or a shorted motherboard. By writing down every observable behavior—including the exact moment the issue began, recent hardware changes, or firmware updates—you create a troubleshooting roadmap that prevents you from chasing phantom problems.
Decoding POST and Beep Codes in 2026
The Power‑On Self‑Test (POST) remains the motherboard’s way of shouting, “All clear!” or “Something’s wrong!” Modern UEFI firmware still outputs beep codes or displays error messages on a debug screen, and most manufacturers publish detailed code tables on their support sites. I keep a cheat sheet on my desk that correlates each pattern to a specific subsystem—CPU, RAM, graphics, or peripheral. When you hear a series of long beeps, for example, it often indicates a CPU initialization failure, prompting a quick reseat of the processor and a check for bent pins. If the motherboard shows a “CMOS checksum error,” a simple CMOS clear (by shorting the jumper or removing the battery for a minute) can reset BIOS settings and resolve the issue. In 2026, many motherboards also provide an on‑screen debug display via a dedicated header; plugging in a small LCD panel can reveal error codes that would otherwise be hidden behind a silent boot.
Visual Inspection: The Power Delivery Path
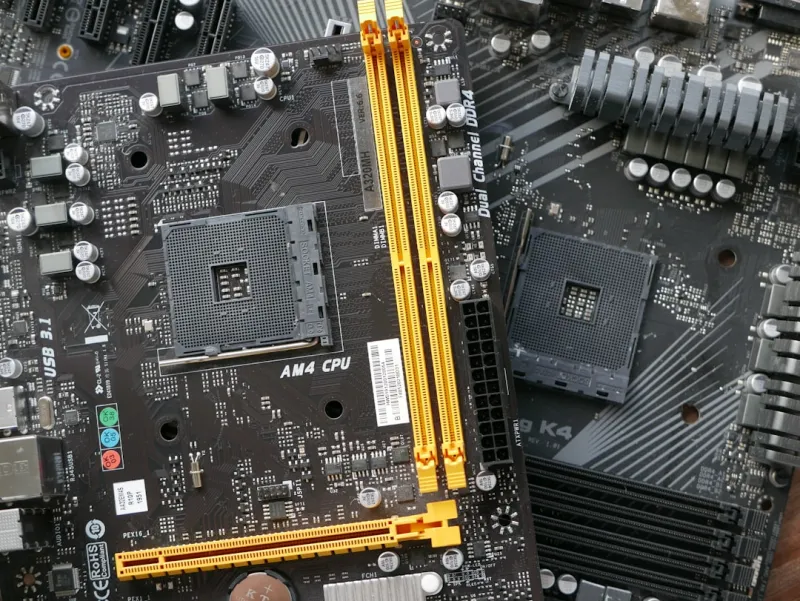
Before you power anything up, perform a thorough visual audit of the board. Look for bulging or leaking capacitors, burnt traces, and any foreign objects that may have slipped into the slots. In my own rigs, I’ve caught a loose screw that shorted the VRM, causing intermittent power loss. Verify that the 24‑pin ATX connector and the supplemental 8‑pin CPU power cables are firmly seated; a partially engaged connector can produce exactly the symptoms described above. While you’re at it, inspect the CPU socket for debris and ensure the cooler’s mounting pressure is even—uneven pressure can warp the socket and cause pin misalignment. Finally, confirm that all PCIe and RAM slots are free of dust; a single grain can create a static discharge that corrupts a BIOS flash. This visual sweep often uncovers the problem before you ever need a multimeter.
BIOS/UEFI Settings and Firmware Updates
Outdated firmware is a silent killer, especially with the rapid evolution of DDR5, PCIe 5.0, and integrated AI accelerators in 2026. I always check the motherboard’s version against the vendor’s release notes—if a newer BIOS adds support for a CPU stepping or fixes a known memory compatibility issue, flashing it can instantly solve mysterious boot failures. When updating, use a USB flash drive formatted to FAT32 and follow the manufacturer’s “EZ‑Flash” utility to minimize risk. After a successful flash, reset the BIOS to default settings, then re‑apply any custom tweaks (like XMP profiles or CPU overclocking) one at a time, testing POST after each change. This incremental approach isolates configuration conflicts that could masquerade as hardware faults.
Isolating Faulty Components: RAM, CPU, and GPU
Component isolation is the next logical step. Start with memory, as it’s the most common culprit. Remove all DIMMs and install a single stick in the primary slot, then power up. If the system still refuses to POST, swap the stick or try a different slot. For deeper diagnostics, I reference the guide Diagnosing and Fixing RAM Issues, which walks you through MemTest86+ runs and BIOS timing adjustments. Next, test the CPU by reseating it and verifying the cooler’s thermal paste is fresh. A CPU that won’t initialize often shows a “CPU fan error” or “No boot device” message. Finally, bench the GPU in another system or use onboard graphics to confirm whether the graphics card is at fault. By methodically swapping each component, you can pinpoint the exact failure point without resorting to guesswork.
Advanced Debugging Tools and Methodical Strategies
When basic checks fail, I turn to more sophisticated debugging tools. A cheap USB‑UART adapter can capture POST debug output from the motherboard’s debug header, revealing low‑level error registers. A multimeter helps verify voltage rails (12 V, 5 V, 3.3 V) against the ATX specifications, ensuring the power supply delivers clean power. For the truly stubborn cases, a logic analyzer attached to the SMBus can decode communication between the BIOS and peripheral controllers. My own workflow mirrors the structured approach outlined in When Motherboards Misbehave: A Power‑User’s Methodical Debugging Guide, which emphasizes logging each test, ruling out variables one at a time, and maintaining a “debug journal” to track patterns over multiple sessions. This disciplined methodology not only resolves the current issue but also builds a knowledge base that speeds up future repairs.
Preventative Maintenance and Future‑Proofing
Once you’ve resurrected a misbehaving motherboard, it’s time to fortify it against future mishaps. Regularly clean the board with compressed air, and schedule a firmware check every six months to capture security patches and hardware support updates. Consider upgrading to higher‑grade VRM cooling solutions if you’re pushing the CPU into the 5 GHz+ range—thermal headroom directly translates to board longevity. In 2026, many builders also add a small UPS to protect against power spikes that can fry voltage regulators. For those planning a long‑term upgrade path, consult the playbook Future‑Proof Your PC, which outlines component compatibility matrices and modular design philosophies that keep your system adaptable as new standards emerge.
Wrapping Up: From Frustration to Mastery
Motherboard troubleshooting can feel like deciphering an alien language, but with a systematic, power‑user mindset you can turn chaos into clarity. By documenting symptoms, leveraging POST codes, performing meticulous visual checks, staying current with BIOS updates, isolating each component, and employing advanced diagnostics, you’ll not only fix the immediate issue but also deepen your hardware expertise. Remember, each failure is an opportunity to learn—so keep that debug journal, share your findings with the community, and stay curious. If you’ve followed this guide and brought your rig back from the brink, you’ve earned a badge of honor that only true power users wear.