
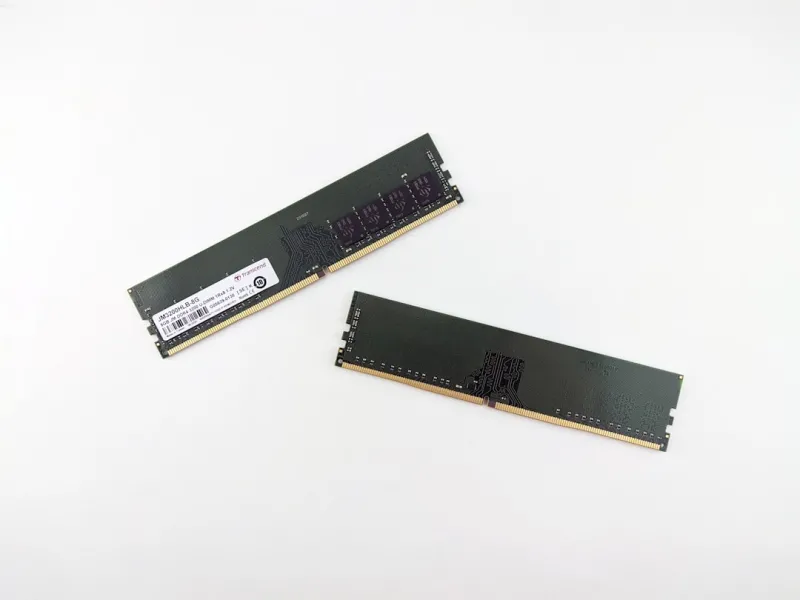
When I first cracked open a desktop back in the early 2020s, the RAM modules felt like the mysterious heart of a computer—pulsing with potential, yet prone to sudden arrhythmias. Fast‑forward to 2026, and the stakes are higher: AI‑enhanced workloads, real‑time ray tracing, and massive in‑memory databases demand flawless memory performance. In this guide, I’ll walk you through the most common RAM pitfalls I’ve seen in the field, why they matter, and the step‑by‑step diagnostics that turn a frustrating crash into a teachable moment. Whether you’re a seasoned builder or a first‑time up‑grader, understanding the language of memory errors—like “blue screen of death” codes, random freezes, or inexplicable reboots—will save you both time and money. We’ll explore hardware checks, BIOS tweaks, and software tools that let you pinpoint the culprit without pulling your hair out. By the end, you’ll have a repeatable troubleshooting workflow that feels as natural as swapping a stick of RAM on a lazy Sunday.
Recognizing the Symptoms Before They Spiral
The first clue that RAM is the villain often hides in plain sight. A system that boots cleanly one day can suddenly start throwing “memory management” errors after a driver update or a new game install. Typical signs include frequent blue screens with error codes like 0x0000001A, spontaneous application crashes, and lag spikes that don’t correlate with CPU or GPU load. In 2026, many users also report “stuttering” in AI‑driven workloads, where the GPU appears idle while the system is actually waiting on memory. Pay close attention to the timing of these events—if they coincide with a BIOS flash, a new RAM kit, or even a change in power settings, you’ve likely narrowed the field. I always start by logging the exact error messages and noting any recent hardware changes; this habit alone has saved countless hours of blind guessing.
Physical Inspection: The Hands‑On First Line of Defense
Before you dive into software logs, give the modules a tactile once‑over. Remove the system’s side panel, ground yourself, and inspect each DIMM for dust, bent pins, or uneven seating. Modern DDR5 sticks have a notch that should align perfectly with the slot; a misaligned module can cause intermittent contact, leading to random crashes. While you’re at it, verify that the motherboard’s Motherboard Mastery: Building the Ultimate 2026 Platform guide’s recommended slot configuration is being followed—dual‑channel operation often requires specific slots to be populated first. If you spot any debris, use compressed air and a soft brush; if a module looks warped, consider reseating it or swapping slots to rule out a bad channel. This hands‑on step may feel old school, but it eliminates a whole class of “ghost” issues before you fire up any diagnostics.
Leveraging Built‑In BIOS Diagnostics
The BIOS has evolved into a robust diagnostic hub by 2026. Most UEFI firmware now includes a memory test that can be launched directly from the boot menu. Run this test for at least three passes; a single pass might miss subtle timing errors. Pay attention to the reported frequency and latency settings—if the BIOS has auto‑overclocked your RAM beyond its rated spec, you may see instability. In my experience, resetting the memory profile to XMP (Extreme Memory Profile) defaults often resolves mysterious glitches caused by aggressive timings. Additionally, enable “Memory Remap” if you’re running a high‑capacity kit; this option ensures the system can address the full RAM space, preventing hidden “address line” errors that manifest as random reboots.
Software Tools: MemTest86, Windows Memory Diagnostic, and Beyond
When hardware checks clear, it’s time to let software do the heavy lifting. MemTest86 remains the gold standard, offering a boot‑able environment that runs exhaustive patterns across the entire address space. I recommend running a full 12‑hour pass on a quiet night—any error, even a single bit flip, indicates a defective module or an incompatibility with the motherboard. Windows also ships a built‑in Memory Diagnostic; while not as thorough, it’s handy for quick checks. For power users, the Diagnosing and Fixing Memory Problems in Modern PCs article outlines how to use performance counters and Event Viewer logs to spot subtle latency spikes that precede crashes. Combine these tools with a stress test on a demanding application (like a modern AI model inference) to reproduce real‑world load conditions.
Checking for Compatibility and Firmware Updates
Even if a RAM kit is listed as compatible on the manufacturer’s website, subtle BIOS revisions can introduce incompatibilities. Always cross‑reference your memory model against the latest motherboard QVL (Qualified Vendor List) and verify that you’re running the most recent BIOS version. In 2026, many vendors release micro‑updates that fine‑tune memory training algorithms, especially for high‑speed DDR5 kits that push 6400 MT/s and beyond. If you’ve recently upgraded your CPU to a new generation, remember that memory controller changes can affect stability—what worked flawlessly on a previous CPU may need new timings on the latest silicon. Updating firmware not only resolves known bugs but also unlocks better power‑management features that reduce heat‑related memory errors.
Power Delivery and Heat: The Unsung Influencers
Memory modules draw power directly from the motherboard’s DIMM slots, and inadequate VRM (Voltage Regulator Module) performance can cause voltage droops under load. This is especially true for high‑capacity, high‑speed kits that consume more current. Check that your motherboard’s power phases are adequate for the memory configuration you’ve chosen; if you’ve overclocked or enabled aggressive XMP profiles, consider a BIOS tweak to raise the DRAM voltage marginally—typically a 0.05 V bump can improve stability without sacrificing longevity. Heat is another silent culprit: many DDR5 sticks now feature integrated heat spreaders, but poor airflow can still cause thermal throttling. Ensure that your case’s fan layout promotes a clear path of cool air over the DIMM slots, and consider adding a dedicated memory cooler if you’re pushing the envelope.
When All Else Fails: Isolating the Bad Stick
Even after exhaustive testing, you may still be left with an elusive “intermittent” error. The most reliable method at this stage is a process of elimination. Power down the system, remove all but one DIMM, and run MemTest86 for a full cycle. Repeat this for each module, swapping slots each time to rule out a defective channel. If a particular stick fails consistently across slots, it’s a clear indication of a hardware fault and should be RMA’d. Conversely, if the same slot triggers failures regardless of the module, the motherboard’s memory trace may be at fault, necessitating a board replacement. Documenting each test in a simple spreadsheet helps you keep track of which combinations have been validated, saving you from repeating the same steps.
Future‑Proofing Your Memory Strategy
Looking ahead, the memory landscape is shifting toward higher densities and faster speeds, with DDR6 on the horizon. To protect your investment, adopt a modular approach: start with a dual‑channel kit that leaves room for future expansion, and choose a motherboard with ample DIMM slots and robust VRM design. Keep an eye on firmware releases, as manufacturers are rapidly adding support for new memory profiles that can boost performance without sacrificing stability. Finally, embrace a regular maintenance routine—clean dust, verify BIOS settings after major OS updates, and schedule quarterly memory stress tests. By treating RAM as a living component rather than a set‑and‑forget part, you’ll enjoy smoother performance and fewer midnight panic sessions.




