

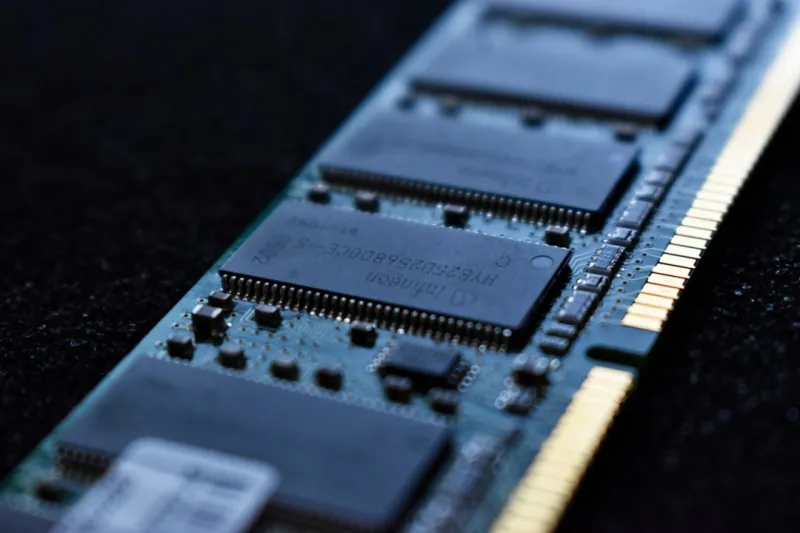
When my workstation started throwing cryptic “IRQL_NOT_LESS_OR_EQUAL” bluescreens, I knew it wasn’t a rogue driver or a misbehaving app—it was the silent saboteur hiding behind the scenes: RAM. In 2026, memory modules have become smarter, faster, and, paradoxically, more temperamental. As a power‑user who builds and tweaks machines for a living, I’ve learned that a single faulty stick can cripple even the most robust rigs. The key is to treat memory like a living organism—monitor its vitals, test its resilience, and intervene before the symptoms become catastrophic. In this guide, I’ll walk you through the diagnostic ladder I climb every time a system hiccup hints at a memory issue, from the obvious warning signs to the deep‑dive tools that separate a flaky module from a genuine architectural flaw. By the end, you’ll have a repeatable process that turns vague crashes into actionable fixes, keeping your workflow humming and your hardware humming along for years to come.
First, recognize the tell‑tale symptoms that scream “RAM trouble.” Random reboots, unexplained freezes during heavy multitasking, and those infamous “STOP” errors are the low‑hanging fruit. But power‑users also notice subtler signs: slight latency spikes in high‑frequency trading simulations, occasional texture pop‑in during game streaming, or sporadic file‑corruption warnings in development environments. These aren’t just annoyances—they’re early warnings that your memory isn’t holding data reliably. The trick is to log these events systematically. I keep a simple CSV log with timestamps, the application in focus, and any error codes displayed. Over a week, patterns emerge, and you can often correlate a specific DIMM slot or capacity configuration with the failures. This data-driven approach not only validates that RAM is the culprit but also gives you concrete evidence when you need to claim warranty coverage or justify a hardware upgrade to stakeholders.
The first line of defense in the Windows ecosystem is the built‑in Memory Diagnostic tool. Launch it via mdsched.exe and let it run a full pass; modern versions now leverage UEFI‑based testing for deeper coverage. However, don’t rely on this alone—its quick test mode can miss intermittent errors that only surface under sustained load. I recommend pairing it with the newer Windows Subsystem for Linux (WSL) stress utilities, which can generate synthetic memory pressure while you watch system logs in real time. If you’re on a system that supports it, enable the “Memory Integrity” feature in Windows Security; it adds a hyper‑visor layer that can catch certain hardware‑level faults before they crash the OS. For those who prefer a Linux‑centric workflow, the memtester utility is a lightweight alternative that runs directly from a live environment, offering granular control over test patterns and iteration counts.
Hardware‑level checks come next. Before you open the case, power down, unplug, and ground yourself to avoid static discharge. Once inside, start by reseating each DIMM—sometimes a simple wiggle can restore a marginal contact that was causing intermittent failures. While you’re there, inspect the slots for dust, debris, or bent pins; a single rogue speck can disrupt the high‑speed signaling required for DDR5 modules. If your motherboard supports it, use the “Clear CMOS” jumper to reset any lingering timing conflicts that might have been introduced during a previous BIOS tweak. I also like to run a visual inspection of the heat spreaders—warped or delaminated thermal pads can indicate overheating, which accelerates dielectric breakdown in the memory chips themselves. These low‑tech steps are often overlooked, yet they resolve a surprising percentage of “random” crashes without any software intervention.
Now, dive into the BIOS/UEFI settings. Modern firmware gives you granular control over memory frequency, timings, and voltage. The first thing I do is disable any automatic overclock profiles and let the board run the memory at its advertised JEDEC specifications. From there, I enable XMP (or its AMD equivalent, EXPO) and manually verify that the voltage matches the module’s rated requirement—usually 1.35 V for DDR5, but some high‑performance kits push 1.4 V. If you’re experiencing instability, lower the voltage in small 0.01 V steps while monitoring error rates; conversely, if you’re chasing maximum bandwidth, consider a modest voltage bump coupled with relaxed secondary timings. Remember to also enable “Memory Scrub” if your board offers it; this feature continuously reads and corrects errors using ECC‑like algorithms, which can mask a failing chip but also give you valuable diagnostic logs in the event of persistent issues.
Compatibility isn’t just about matching the same brand or speed; it’s about the subtle interplay of motherboard trace design, CPU memory controller, and DIMM geometry. In 2026, many enthusiast boards advertise support for “up to 128 GB DDR5‑6000,” but real‑world performance can vary wildly depending on the CPU’s integrated memory controller (IMC) capabilities. I always cross‑reference the motherboard’s qualified vendor list (QVL) before purchasing. If you’re mixing different capacities or latencies, ensure they are all within the same speed bin—mixing a 5600 MT/s stick with a 6000 MT/s module can force the entire kit down to the lowest common denominator, potentially causing timing mismatches. When in doubt, run a full memory bandwidth benchmark (e.g., AIDA64 or Geekbench) after each installation; a sudden dip of more than 10 % often signals an underlying timing conflict that needs manual adjustment.
On the software side, keep your chipset drivers and firmware up to date. In 2026, many manufacturers release micro‑code updates that fine‑tune the IMC’s interaction with high‑speed RAM, addressing subtle bugs that only appear under specific workloads. I also recommend disabling any third‑party memory optimization utilities that claim to “boost performance” by reallocating buffers; they can interfere with the OS’s native memory manager and create false positives in diagnostics. For developers, tools like Visual Studio’s Diagnostic Tools or the Linux perf suite can help spot memory leaks that masquerade as hardware faults—leaked allocations can exhaust available RAM, leading to page‑file thrashing that mimics a faulty module. By eliminating software‑induced memory pressure, you isolate the hardware variables and make subsequent testing more reliable.
When it’s time for deep testing, I reach for the gold standard: Mastering RAM Troubleshooting. This playbook walks you through creating a bootable USB with MemTest86, configuring custom test patterns, and interpreting error logs that pinpoint the exact byte and address of a failure. A thorough MemTest86 run should cover multiple passes—each pass stresses different aspects like address line integrity, data bus stability, and ECC error correction (if present). I also supplement this with stress‑testing utilities like Prime95’s “Blend” test, which throws a mix of CPU and memory workloads at the system to surface heat‑related errors. If errors persist after multiple passes, you’ve likely identified a defective module and can initiate an RMA with confidence, backed by concrete evidence.
Prevention is the final piece of the puzzle. Even after you replace a faulty stick, you’ll want to future‑proof your setup against the next memory‑related nightmare. I recommend adopting a “dual‑channel redundancy” philosophy: install identical DIMMs in mirrored pairs, so if one fails, the other can carry the load while you schedule a replacement—this approach is common in workstation‑grade rigs and can be a lifesaver for mission‑critical environments. Additionally, keep an eye on thermal performance; modern DDR5 modules can run hot, and a well‑ventilated case with directed airflow over the DIMM slots extends lifespan. For a deeper dive on why memory issues can crash even the best PCs, check out Why Memory Issues Crash Even the Best PCs—and How to Fix Them. By combining disciplined diagnostics, meticulous hardware handling, and proactive system design, you’ll keep your PC humming smoothly in 2026 and beyond.